
Beginner's Guide to Epoxy Resin
Epoxy resin is a versatile material that has gained popularity among DIY enthusiasts and craftsmen alike. Whether you are a beginner or an experienced artist, epoxy resin offers endless possibilities for creating stunning and durable projects. In this guide, we will explore the basics of epoxy resin and provide you with essential tips to get started.
What is Epoxy Resin?
Epoxy resin is a type of synthetic polymer that, when mixed with a hardener, cures to a strong and durable plastic-like material. It is widely used for various applications, including crafting, woodworking, jewellery making, and even as a protective coating for floors and countertops.
Getting Started
If you are new to working with epoxy resin, here are some key steps to help you get started:
- Choose the right resin: We normally recommend to beginners our easy to use 1 to 1 ratio, Precision Pour Epoxy Resin. This comes in 200g, 1L and 10L kits, UV resistant and has a work time of 30-40 min.
- Prepare your workspace: Epoxy resin can be messy, so it's important to set up a clean and well-ventilated workspace. Cover your working surface with plastic or wax paper to protect it from any spills or drips.
- Measure accurately: Epoxy resin requires precise measurements of resin and hardener in order to properly cure. Use a digital scale to measure the components accurately, following the manufacturer's instructions.
- Mixing the resin: After measuring the resin and hardener, combine them in a clean mixing container. Use a stir stick or a plastic scraper to thoroughly mix the components together. Avoid vigorous stirring, as it can introduce air bubbles into the mixture.
- Adding pigments and additives: If desired, you can add pigments or dyes to enhance the appearance of your epoxy resin.
- Pouring and curing: Once your resin is mixed and any pigments or dyes are added, carefully pour it into your desired mould or surface. Allow the resin to cure. This typically involves a waiting period of several hours to overnight.
Tips and Tricks
Here are a few additional tips to help you achieve the best results with epoxy resin:
- Work in a dust-free environment to avoid any particles settling into the resin while it cures.
- If you encounter air bubbles in your resin, you can use a heat gun or a torch to carefully remove them. Be cautious not to overheat the resin, as it can cause it to yellow or become brittle.
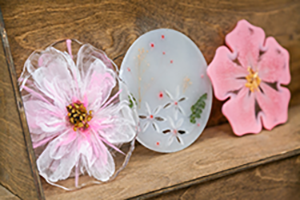
- Experiment with different techniques, such as layering colours or incorporating objects like dried flowers or glitter, to create unique and visually appealing resin pieces.
- Always follow the safety guidelines provided with every purchase, including wearing gloves, a mask, and working in a well-ventilated area.
With practice and experimentation, you'll soon discover the endless possibilities and creative freedom that epoxy resin offers. So, get started on your epoxy resin journey and unleash your artistic potential.